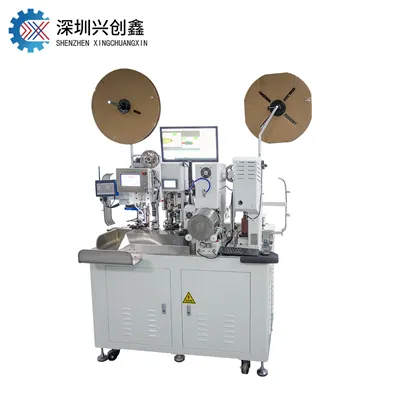
A crimp that looks perfect can still fail in the field-contact resistance creeps up, oxidation sets in, and the connection drops out under vibration. Achieving a truly reliable crimp isn't luck; it's a repeatable process. This short guide walks you through the essential steps to produce gas‑tight, mechanically sound crimps every time, whether you use a manual tool or a fully automatic terminal crimping machine.
Step 1: Choose the Right Tooling
Match the die set to the terminal series and wire gauge.
Ensure the crimper is calibrated and dies are properly aligned.
Worn or misaligned dies create uneven compression-replace or service them regularly.
Step 2: Prepare the Wire Flawlessly
Strip insulation to the exact length specified by the terminal drawing (typically ~1/4 inch).
Use a precision stripper-do not nick or cut conductor strands.
Remove any oxidation and re‑twist loose strands into a tight bundle.
Discard wires with damaged insulation.
Step 3: Insert Wire Correctly
Push the stripped wire into the terminal barrel until the insulation touches the stop.
The conductor end should be flush with or just past the barrel edge.
All strands must be captured inside the crimp barrel-none outside (except the bellmouth).
Step 4: Execute the Crimp
Place the loaded terminal in the correct die.
Apply controlled, uniform pressure (manual or hydraulic).
For hydraulic tools, maintain 7,000–10,000 PSI for 5–10 seconds.
Let the tool complete its full stroke-do not release early.
Step 5: Inspect Every Crimp
Visual check-look for:
No cracks in the crimp barrel
Insulation grip securely holds the insulation
Bellmouth (flared ends) visible-this signals a gas‑tight seal
No insulation trapped inside the conductor crimp
Symmetrical crimp with minimal burrs
The Seven Most Common Defects
Even with careful execution, certain defects frequently occur. Understanding them helps you catch problems early.
Undercrimp happens when too little force is applied. The strands are not compacted enough, leaving air gaps that allow oxidation to creep in. Over time, contact resistance rises and the connection becomes unreliable.
Overcrimp is the opposite-excessive force that can break individual strands or even crack the terminal barrel. This reduces the effective cross‑section and creates stress points that may fail under vibration.
Missing strands usually result from nicked or broken wires during stripping. Fewer strands mean less current‑carrying capacity and a weaker mechanical hold.
Insulation trapped in the crimp occurs when the strip length is too short or the wire is inserted too deep. The insulation prevents metal‑to‑metal contact, leading to high resistance or intermittent connection.
Wrong wire gauge is a simple but costly mistake. Using a wire that is too large or too small for the terminal will never produce a proper crimp, regardless of tooling.
Misaligned wire means the conductor is not centred in the barrel. This causes uneven compression-one side may be over‑crimped while the other is loose.
Nicked strands are caused by dull or incorrectly set stripping blades. Even a slight nick creates a stress riser that can snap under tensile load, drastically reducing pull‑off strength.
By checking for these seven defects during production, you can eliminate the vast majority of crimp failures before they reach the customer.
Verify the Quality
Three methods confirm a good crimp:
1.Crimp height measurement – use a micrometer with a point and blade; compare to terminal manufacturer's spec. This is the most accurate non-destructive test.
2.Pull-force (tensile) test – destructive; run on samples. Set pull speed at 50 mm/min and take at least 5 measurements per setup. IPC/WHMA - A - 620 specifies minimum forces (e.g., 10 N for 30 AWG up to 265 N for 8 AWG).
3.Cross-section (micrograph) – for critical applications; ensures conductor compression of 75–85% and a honeycomb structure with minimal voids.
Remember: visual inspection alone is not enough-always sample test.
Conclusion
A perfect crimp is repeatable when you control tooling, wire prep, insertion, execution, and verification. Build these five steps into your production routine, inspect for the seven defects, and test regularly with crimp-height and pull-force checks. Your connections will stay gas-tight, low-resistance, and reliable for the life of the harness.
Need equipment that guarantees consistent crimps? [Browse our terminal crimping machines] or [contact our engineers] for a free process review.